YOU WILL NEED:
* Paint Shop Pro or similar. I used PSPX but you should be able to make this tag in earlier versions.
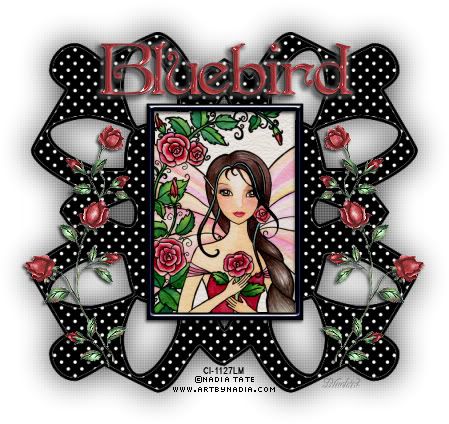
* Tube of choice. I used the artwork of Nadia Tate and you can purchase her art from CILM.
* Ding font of choice. I used Chunklight by Web Of Dreams. This website has closed and I have substituted Circle Things 2. See example at the bottom of the page.
* Font of choice. I used Penshurst.
* Eyecandy 4000 Glass and Gradient Glow. (Can substitute inner bevel for glass and a drop shadow for the gradient glow.)
* MuRa's Filter Meister Tone HERE
* Super Blade Pro with clear glass preset. (Can use any text filter effect you like.)
* Accent tube of choice. I used the rose.
LETS START
1. Set up your supplies ready to use.
2. New canvas 700 x 700 with a white background.
3. Set the foreground and background on your materials palette to black (or a complimentary colour from your tube). Select your text tool and using your ding font at the following settings, draw out your shape. Do not fill up your whole canvas with your shape as we will be cropping shortly. If you are using the same font as I did, I used the letter Y. (Lower case w for the second example.)

4. When you are happy with the size of your shape, convert to raster and duplicate the layer.
5. On the bottom shape layer apply gaussian blur at the following settings.

6. Apply the blinds effect (Effects - Texture Effects -Blinds) to your blur layer on the following settings. Reapply the blind settings with the horizontal box ticked. Reduce the opacity of this layer to 80%.

7. Activate the top shape layer. Selections - Select All - Float - Defloat - Modify - Contract by 4. Apply MuRa's Filter Meister Tone at the following settings.

8. Invert the selection and promote to layer. Select none and apply Eye Candy Glass using the Depression Era Glass setting. Close off the white background layer and merge visible. Control C, then Control V to cut and paste your merged shape as a new image. Add a new raster layer to your trimmed shape and floodfill with white. Move the white layer to the bottom. You can close your original canvas as we will only be working on the smaller one from here. Check the size of your canvas - you may wish to resize at this point. I made my canvas 500 x 500. Resize your shape to 80%.
9. Open your tube. If it does not have a background, duplicate the tube and close the original. Add a new raster layer and floodfill with a complimentary colour. Move the floodfilled layer to the bottom. Add a subtle texture to this layer if you like. Merge with your tube and copy and paste to your shape canvas. Resize your tube to sit in the middle of your shape (I resized to 45%). Use the example at the top of the page as a guide. You may need to sharpen your tube after resizing.
10. Activate your Preset Shapes tool. With black as your foreground colour and the background closed off, draw a frame for your tube using the following settings.


11. Ensure your frame covers the edges of your tube. When you are satisfied with the position of your frame, convert to a raster layer and Select all - Float - Defloat. Apply Eyecandy Glass on the Depression-era Glass setting (or inner bevel of your choice). Select none. Merge with your tube layer and add drop shadow at the following settings. You can Control C, Control V your tube layer to make sure it is exactly centred on your frame (delete the blank layer).

12. Open your accent tube. If you are using the rose tube supplied, Image - Rotate Left. Resize your accent (I resized to 50%) and sharpen your tube if required. Depending on the tube you are using, the rose will have to be recoloured to match your tube. Use your magic wand tool to select all the roses. Adjust - Hue and Saturation - Colorize and adjust the settings until you find a colour your like.

13. Position the rose on your canvas and when you are satisfied, duplicate and mirror the layer. Merge the two rose layers together and add the same drop shadow as before. Close off the white background layer and merge visible layers. For the second example, I used MuRas Copies filter on the settings below. Duplicate the layer and rotate one layer 30 degrees Right. Pull one layer to above your white background and apply drop shadow. Add shadow to other rose layer and frame.

14. Activate your text tool with your second font. Chose a colour from your main tube that compliments your accent tube and make this the foreground and background colours on your materials palette. Type your name at the following settings.

15. Apply Super Blade Pro with the clear glass setting twice (or an inner bevel). While still selected, Adjust Hue and Saturation to match your accent tube. Promote selection to layer, select none. Apply the same drop shadow as before. Apply Eyecandy Gradient Glow on the following settings. Apply drop shadow again. For the second example, I used Penshurst on 48 as a Vector and when I applied it to the canvas I streched it to make it taller, not wider. Convert to raster and apply Eye Candy Glass - Ruby setting. Apply Eye Candy Gradient Glow.

16. Add copyright information and your watermark. Crop any excess white background from your canvas, being careful not to crop any of your blur away. Save as a .jpg file and you are done. I hope you enjoyed this tutorial.


No comments:
Post a Comment